![](https://blogger.googleusercontent.com/img/b/R29vZ2xl/AVvXsEi0cLbH-cCB4mSQQnMya_vyPGUUEHoYZUVmMapuLW8gXItbyQ52RRd8vjC7NvoToSjuQxWP3N4iPsKu9s6UTDAAtu_VMRgBm8yCNnGg9zOJLbySfFZ_aaCMpSuQigVlaRLUCTDiq1SpDqzZ/s320/Picture+011.jpg)
![](https://blogger.googleusercontent.com/img/b/R29vZ2xl/AVvXsEicijUbqo2TMbY5fuksSzxAuPOZaCEndXmMw8KlAGgBBrubV9rzN291DCcD1BPJWp-0AZwujZ6gWZCKzL99AhM6BVTEnEv2dGplweQTYSWgyK5rSgZ-_plINbjdjTzGFTkgF8BsIBPgs9DQ/s320/Picture+007.jpg)
![](https://blogger.googleusercontent.com/img/b/R29vZ2xl/AVvXsEjmYdBcPpNMfFD-89RPE0bLPx_-3-tx-BFf2BHPk2XzC5Pw6jWvsRsAzUo8Zko8rphu9O_NXBIm5gfluB04TaWhjaY-5zk9lm6EIxCUiJTXNMlI6Mx5obdLCoH93kXKDZqrgu7IwNx3ClXt/s320/Board.jpg)
![](https://blogger.googleusercontent.com/img/b/R29vZ2xl/AVvXsEiQIyDuLUvlOTeSQoA7JG2AILRjXL677E9EiVpuYU5Jh_GiAvOlKYS7lwdvTtlYtWiDmO1dRa-4q54EXxL2GowFrNtRfZ723lAWt7pcqGGM5y4uuEfFyEybq7Zb_IaUlSXi25fPMScvVsEd/s400/Picture+016.jpg)
![](https://blogger.googleusercontent.com/img/b/R29vZ2xl/AVvXsEjJwKAlw68TfGgnqCFLXo7sQzI8bjgnRTeZn_3nMmINb2OHzOn5nuqyCJjAwg7L4DB3BSqWCpDCm8wGR434zWeMMY4RcKfwL0_hhYmtRh04u5vLb4qogmVcnzlUpMNqTWL5V1ZjU8KvwX1x/s400/Picture+021.jpg)
![](https://blogger.googleusercontent.com/img/b/R29vZ2xl/AVvXsEjQTQPwpCCZ-ijKh-wDWa7vxP8W2JfDTl1bs_Ovn0Dk0pcqF0E2YUind1Bh1_oClVAyjtpTm8hqU9TByMMj1TsU-nS13GgLOKBrAMC7WOmSh_5oi8PxInAbTJzmsiFCty4TiLe0SKXZwk5_/s400/Picture+023.jpg)
![](https://blogger.googleusercontent.com/img/b/R29vZ2xl/AVvXsEj2sO5hn5A_Puk0J5Lu4YPoSRLqJ2-Yoy4YcXmT3u8TatX4OT0N52GTM2ta2Nu2VakRMv_5Cvc6RlO2ioVKxu01ihh8x_r0Qt-bZ5cQ894EzvQQcV_5nBql-fN0GOZO5h_ZisAyTeHjuvTr/s400/Picture+019.jpg)
![](https://blogger.googleusercontent.com/img/b/R29vZ2xl/AVvXsEicBapY9TLAUOFvpkYj0YKDHUPOaklBfJmnwJKBI4nGRjs0-vbxlSUEOTy11wEXPKO8TUzjuOfwb5pbtVJfhTtvAm3HhaA32mgmahRtDz2arjnkpkbRKUDuPv0yRJByYjFI-wEEZzwHfJng/s400/Picture+002.jpg)
Here is a tutorial on how to mod podge your letters:
1. Pick out your letters. In the past I have bought thicker letters from The Wood Connection, but for this project I chose skinny wood letters from Hobby Lobby. You'll also need some card stock the size of the letter.
2. Paint the backs of the letters. Let FULLY dry before you go on to the next step.
3. Apply a thin coat of Mod Podge on the front of the unpainted letter and place paper on the wood (make sure if you are using a pattern that it is even *I forgot to do this* Silly me). Cut paper to make it easier to sand off for the next step and bend up toward the letter.
4. Take a medium grade piece of sand paper (or if you're desperate, a nail filer) and sand around the edges of the letter. This will cut the paper perfectly so you won't have to do any measuring or cutting with scissors. Remember to let the glue dry completely before you try to sand or you will rip the paper and your edges will not be smooth.
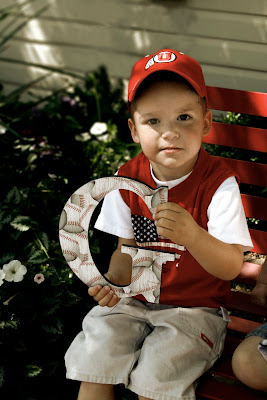
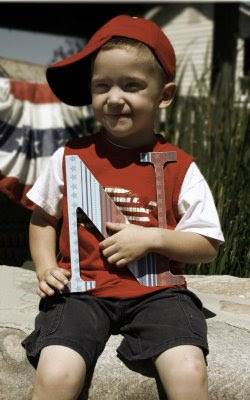
And, that's it. Here is a pic of the finished letters.
6 comments:
That's super cute, Hailey. Do you think I could come over sometime and do some fun letters with your help?
Those are adorable! What a good idea. I know she will love it, heck I love it.
What a cute idea!! I may have to steal it! You are so creative!!!
What a cute project! I bet she loved it! All the kids are so cute!
Very cute! I am already planning on doing this for Mother's Day! And I am also stealing your idea for the birthday card. I don't know how you find the time to do this fun stuff!
This was the one of the best presents I have ever gotten.
Love to my Kids.
Gran
Post a Comment